

I am a nurse who charts from home three evenings a week, and by the time I close the last note my wrists feel like they have been wrung out. I used to think that was just part of the job, until I swapped my old keyboard for the Logitech MK345 wireless keyboard and mouse combo with the built-in palm rest. A year ago my right wrist started aching before I even hit the two-hour mark. That got my attention.
The problem almost never comes down to one thing. It is a combination of keyboard height, wrist angle, how long you go between breaks, and whether your gear is working with your body or against it. The good news is that every one of those factors is fixable, and most of the fixes cost nothing. One of them costs under $35 and made a bigger difference than anything else I tried.
Your wrists hurt because your keyboard is making you work in the wrong position.
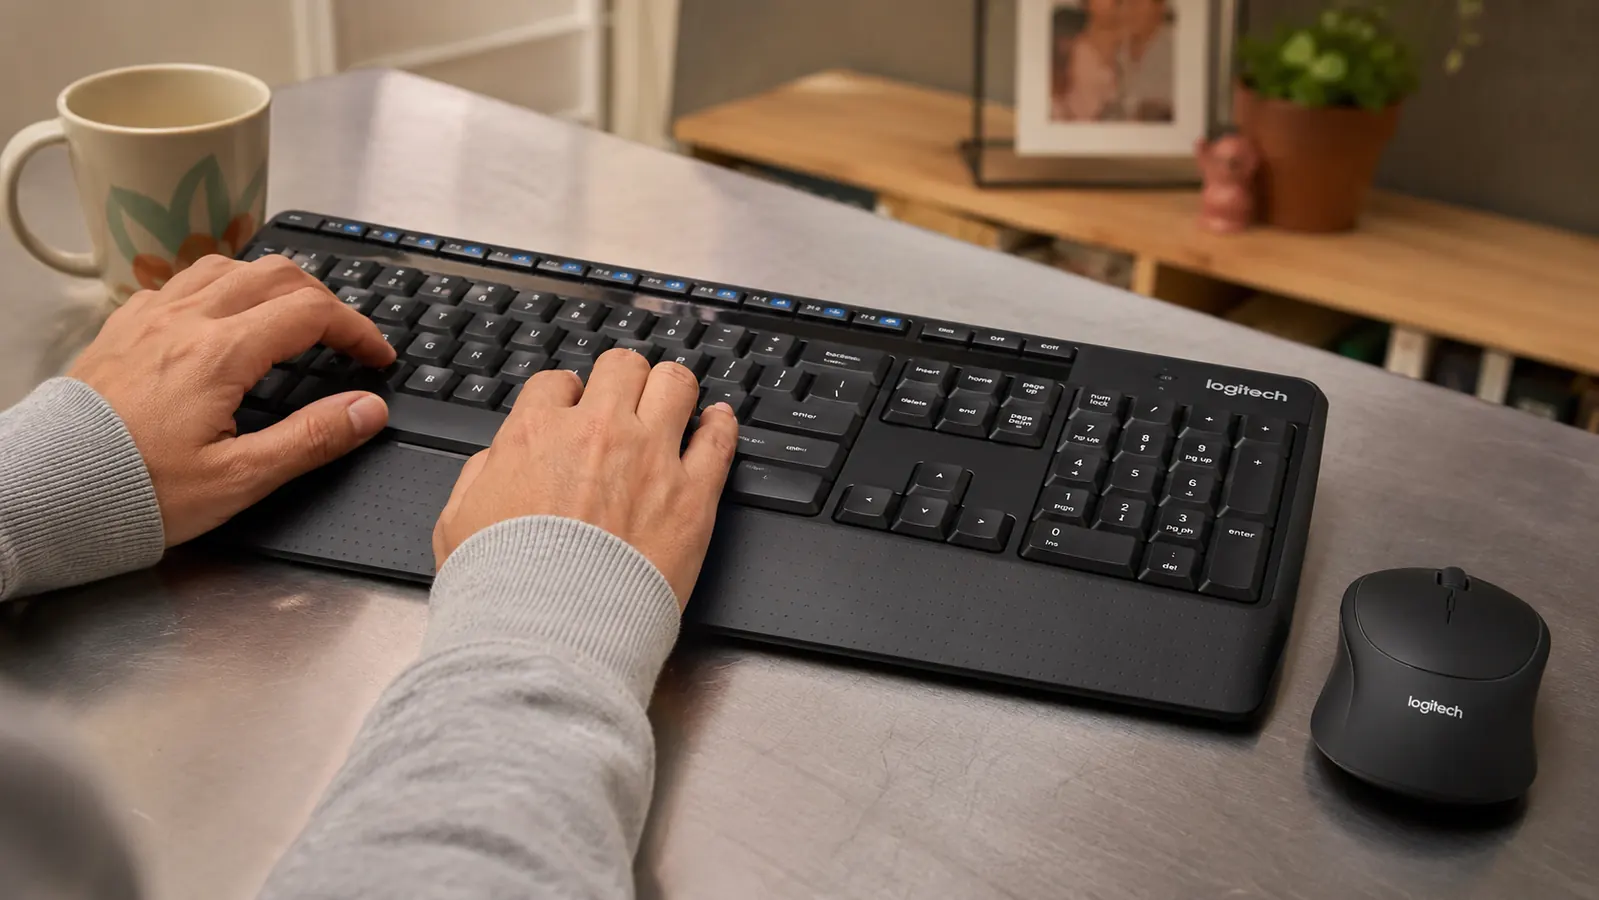
The Logitech MK345 has a built-in padded palm rest that keeps your wrists flat and neutral while you type, so the strain stops building up over a long session. Over 41,000 people use it daily.
Amazon Check Today's Price on Amazon →Step 1: Get Your Keyboard to Elbow Height
The single most common cause of wrist strain at the keyboard is typing on a surface that is too high. When your desk is above your elbows, your wrists bend upward to reach the keys. That position puts constant tension on the tendons that run from your fingers up your forearm. Do it for two or three hours and you will feel it. Do it for two years and you may end up with tendinitis.
The fix: sit so your elbows are bent at roughly 90 degrees and your forearms are roughly parallel to the floor. Your keyboard should sit just below that height, not on top of it. If your desk is fixed and too tall, a keyboard tray that mounts underneath the desk surface is worth the $40. If your desk has height adjustment, lower it a centimeter or two and see whether your shoulders drop and your wrists flatten out. They usually do.
Adjust your chair height first before you touch the desk. Most people sit too low rather than too high, which forces them to reach upward. Raise the seat until your forearms clear the desk edge without your elbows lifting toward your ears. Then check your feet. If they dangle, put a book or a foot rest under them. Posture from the floor up matters more than any single piece of gear.
Step 2: Keep Your Wrists in a Neutral Position While You Type
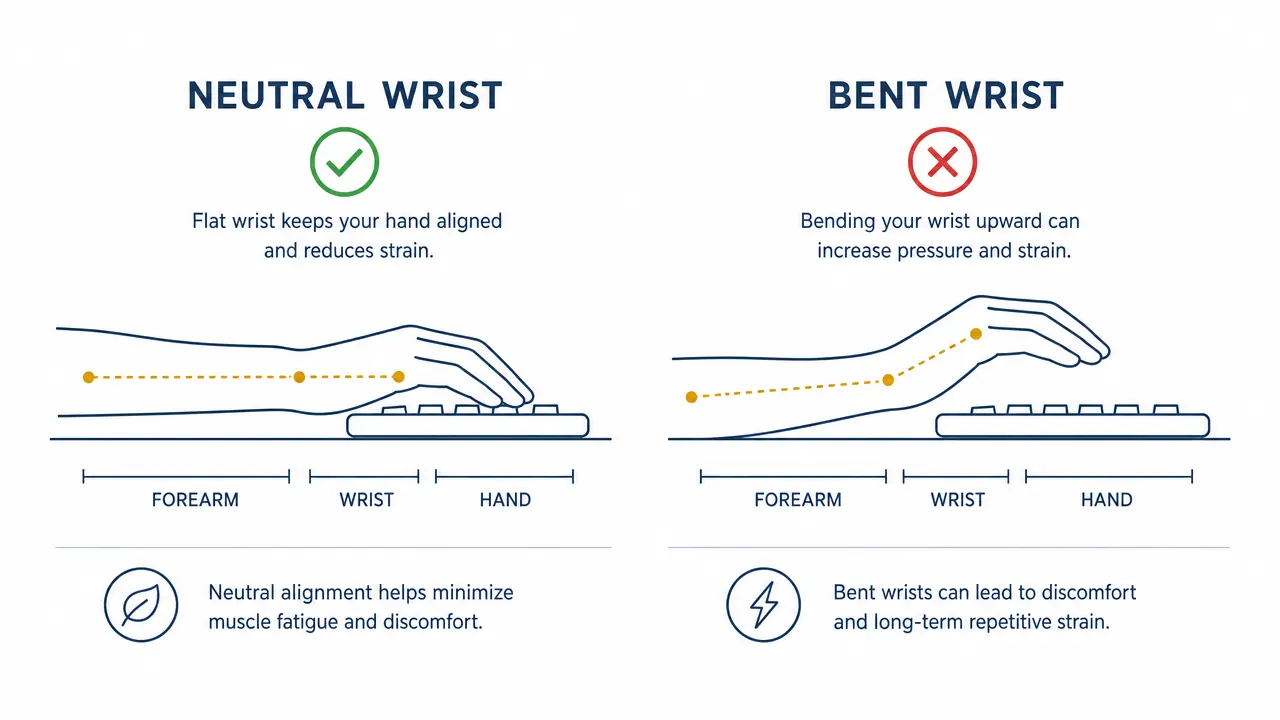
A neutral wrist means the back of your hand and your forearm form one straight line. Not tilted up, not bent down, not rotated inward. The moment your wrist breaks out of that line, the tendons inside the carpal tunnel start to rub against each other with every keystroke. Over the course of a long shift, that adds up fast.
Two things help here. First, if your keyboard has flip-out feet on the back that angle it upward, fold them back down. Almost every keyboard ships with those feet extended, and almost every ergonomics guide recommends you ignore them entirely. A flat or slightly negative-tilt keyboard keeps your wrists much straighter than a keyboard propped up at an angle. Second, a padded palm rest gives your wrists a place to rest between keystrokes without forcing them into an awkward angle. The key word is between. You should rest on the palm support when you pause, not press down on it while actively typing.
This is where the Logitech MK345 earns its place. The keyboard has a built-in padded palm rest that sits at exactly the right height relative to the key surface. I have used keyboards with aftermarket wrist rests that were either too thick or too soft, and both create their own problems. The MK345 rest is part of the keyboard design, so the geometry is already solved. My wrists stay flat through an entire charting session without me having to think about it.
Step 3: Fix Your Mouse Grip and Position
Most wrist pain conversations focus entirely on the keyboard and completely ignore the mouse. That is a mistake. If you are mousing with a tense grip and your arm stretched out to the side, the tendons in your wrist are under load even when you are not typing. Over the course of a day, the mouse may actually cause more cumulative strain than the keyboard does.
Start by checking how far your mouse is from your body. It should sit close enough that your upper arm hangs relaxed at your side while you use it. If you have to reach forward to reach your mouse, you are contracting your shoulder and forearm continuously to hold that position. Move it closer. Then check your grip. You want a loose, relaxed hold, not a tight pinch. If you find yourself clenching, that usually means the mouse is too small for your hand or you are rushing. Slow down slightly and the grip will loosen on its own.
The Logitech MK345 comes with a full-size contoured mouse that fits a medium-to-large hand naturally. I have smaller hands and still find it comfortable because the shape encourages a relaxed palm grip rather than a fingertip grip. For long charting sessions, that shape difference matters more than most people expect.
By the end of my second week with the MK345, I realized I had stopped noticing my wrists. That is the goal. The best ergonomic setup is the one you forget about.

Step 4: Take a Micro-Break Every 25 to 30 Minutes
No setup change eliminates the need for breaks. The tendons and muscles in your forearms need periodic rest to clear the low-level inflammation that builds up during repetitive motion. A micro-break does not mean stopping work. It means pausing the typing for 60 to 90 seconds, dropping your hands to your lap, and letting your forearms go loose.
I use the Pomodoro method, not because I am particularly disciplined about it, but because it gives me a natural stopping point every 25 minutes when I finish a charting note. At that pause I do two quick stretches: the prayer stretch, where you press your palms together in front of your chest with your fingers pointing up and hold for 20 seconds, and the reverse prayer, where you flip your hands so the backs are pressed together and fingers point down. Both of these decompress the carpal tunnel and take about 40 seconds total.
If 25 minutes sounds too frequent, start with every 45 minutes and work backward. The research on typing-related repetitive strain consistently shows that frequency of breaks matters more than the length of each break. Six 90-second pauses across a three-hour session do more than one 10-minute break in the middle.

Step 5: Audit Your Full Setup Once a Month
Setups drift. You push the keyboard back to make room for a notebook. You raise the chair to see your monitor better and forget to re-check your elbow angle. Someone borrows your chair and sets it lower. A monthly five-minute check of your whole workstation catches these small shifts before they compound into a pain problem.
The checklist is short. Elbow angle at or just under 90 degrees. Wrists flat when you reach the keyboard. Monitor top at roughly eye level so you are not craning your neck downward. Keyboard at desk height or slightly below, feet on the floor. Mouse within arm's reach without stretching. That is the whole audit. It takes less time than making a cup of coffee.
If you go through that checklist and everything looks correct but your wrists still hurt, the issue is almost always the keyboard itself. A keyboard with a high-profile key bed, stiff actuation, or no palm support forces your body to compensate in ways that a monthly audit will not catch because the problem is the tool, not the position.
What Else Helps
Beyond the five steps above, a few additional changes have made a meaningful difference in my own setup. A sit-stand desk or even just standing for 20 minutes an hour gives your whole upper body a different load, which prevents any single muscle group from being overworked. If you are still on a fixed desk, even standing at a kitchen counter for one charting session a day helps.
Voice dictation for long-form text entry has improved a lot in the past two years. I use it for narrative notes when I am tired and my wrists have already taken a beating. It is not faster than typing for most people, but it gives your hands a genuine rest while you still make progress on the work.
Finally, if your wrist pain is accompanied by tingling or numbness in your ring finger and pinky, that pattern points to the ulnar nerve rather than the carpal tunnel, and the fix is different. Elbow position becomes more important than wrist position in that case. Do not ignore numbness. That is your nervous system asking for a change faster than tendons usually do.
For most people dealing with the dull ache that builds up over a long typing day, the steps above solve it completely. Start with Step 1 today. You do not need to buy anything to see whether fixing your keyboard height reduces your symptoms. If it does, you have your answer. If the ache persists after correcting your height and angle, that is when a keyboard with a proper palm rest like the MK345 fills the gap that posture alone cannot close.
The full guide to building an ergonomic keyboard and mouse setup is in the wireless keyboard and mouse combo breakdown. And if back pain is also part of your picture, the lower back pain guide covers the chair and posture side of the same problem. For a deep look at how the MK345 performs over the long haul, the three-year review covers everything from battery life to key feel after daily use.
Stop finishing your workday with sore wrists. The MK345 palm rest keeps you in a neutral position so the ache stops building.
It is wireless, the batteries last two years, and the padded palm rest is built in. No extra piece to buy, no extra thing to keep track of. The current price on Amazon is about the cost of one co-pay.
Amazon Check Today's Price on Amazon →